Pages

Thursday, February 24, 2011

Look what I received....

Hi All

Sorry, I haven't posted in a little while. Frank, my significant other, brought my birthday present home the other day, a cold. And boy it's been a duzy. I haven't had a cold for 4-5 years and I haven't had a flu shot in 3 years so I finally caught a cold. OK, now that I've explained my absence lets get on to more fun things..........


Well, I just have to share with you all, a card that I received for my birthday from Pat. The card came packaged in it's own little box. Now how cool is that.


Next, I untied the bow.............


and peeked inside 


And here is the card that was inside,
very pretty isn't it!!

My birthday was Tuesday, and I received cards, gifts and calls from friends. Thanks to all of you, especially to Barb who left me a song. Loved it!!!

Well that is it for now, thanks for stopping by, see you soon, and.....


Friday, February 18, 2011

A Fan Fold Card

You remember the Fan Fold card that I posted in the Blog Hop post February 13??? Here are a few pictures of that card. It is so cute.


Well, I mentioned that I would make a video for everyone, to guide you thru the construction of the card  and also show you how easy this is to make. Well, here is the video.


I have a new tab, or page at the top that says, Videos and Techniques. This page will now house all of my videos and any techniques that I publish. I hope that this will make it easy to find a video, all in one spot.


Please be sure to let me know if you have any questions.


Have fun making your own Fan Fold Card. I would love to see your creations.

That's it for now, thanks for stopping by, see you soon,

Thursday, February 17, 2011

Card Patterns Sketch 102


Hello there,
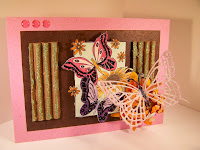
Today, I want to share with you a new sketch from Card Patterns and show you my take on that sketch. The stamp I used is so pretty, its in a set from Sparkle N Sprinkle, set 160 Butterflies. I also glittered some corrigated pieces, used one of my handmade flowers and topped the flower with a butterfly made out of vellum and covered in glitter.


Stamp- Set 160 Sparkle N Sprinkle
Markers - Copic Markers
Glitter - Bridal G1029, Black Ice G1020, Aquamarine G1062 (all Sparkle N Sprinkle)
Butterfly Die - Mariannes Design LR0115

Hope you like the butterflies. These remind me of warmer weather and it's coming.

Well that is it for now, thanks for stopping by, see you soon


Wednesday, February 16, 2011

Joan's Garden's Challenge JG0210

Hello Everyone
Here is my entry for Joan's Gardens Challenge. Her requirements are:
Card Challenge #7
Here is what you need to do for Joan's Gardens Weekly Challenge #7....
• Use designer paper for your background
• Use no other stamping except for a sentiment and frame (such as a JustRite Stamp)
• Use all the embellishments you would like to use
• Use some kind of dimension on the card (such as a flower)

So here is my submission,

Those flowers are made with the Cuttlebug quilling daisy kit. These are so nice and the flowers turn out great every time.
Verse -Great Impressions
Paper - K & Company Blue Awning
Swirly Pearls - Michaels
Lace - Gift from a friend


Thanks for stopping by, see you soon,


Tuesday, February 15, 2011

It's a paisley, nope.... it's a bird.

Hello Everyone

I want to thank all of you who stopped by on the blog hop Sunday. I think everyone got great ideas and lots of inspiration from all the different participants. I had a great time reading all your comments. The fan fold card, by far, received the most comments of all three of the cards I posted. Tomorrow I will start on the video and should have it ready for you very soon. As soon as it's ready I will post it and for those of you who follow my blog I will make sure you see the announcement in my post.

Today I want to share with you 2 cards I made. Each of these cards contain a bird. However these birds start out as a paisley. Yes, that's right, I said a paisley. There is a story behind how this came about:
 

 I was looking at some stamps that were being introduced and as I looked at the bird and the way it was designed and colored, I saw a paisley shape in the bird. So, I got out the paisley stamps from Sparkle N Sprinkle and stamped the paisley shapes. These stamps are in Set 350 -  Paisley Medallion. I cut them out and then I made a template or 2 to use with the stamped paisley image and the next thing I knew I had a bird.


So, here is the first bird that I made. I used the paisley that has flowers in it. He is so cute and I was amazed at how easy it was to do.


Next, I wanted to use the other paisley. It looks like there are feathers in the design. So, I did the same thing , stamped it up, cut it out, fiddled with my homemade templates and wella................ another birdie is born. Now this time I added glitter. You know, birds are always so popular and this is so easy to make your own. These guys have personality, too.

These birdies are just so darned cute.


Let me know what you think. Would you like to know how I did this??? Leave me a comment.
Well that's it for now, thanks for stopping by, see you soon,


Monday, February 14, 2011

HAPPY VALENTINE'S DAY

Hello everyone. Hope you had a great weekend. Today is Valentine's Day. What a great day. Chocolates, a great dinner at your favorite place, a diamond, jewelry, wine, champagne, and the list can go on and on. Here is a nice little Valentine's Day card. The only stamping on this card is the verse. The background is made using a Tim Holtz embossing folder. The heart is from a store bought card someone gave me, so, I thought I would reuse the heart on my own card. The punch is EK Success and the ribbon is May Arts. Glitter is Sparkle N Sprinkle and is Aztec Gold(G1006). I love their glitter. It is so great.

Well, have a great day and here's to you on this Valentine's Day.


Thanks for stopping by, see you soon,


Sunday, February 13, 2011

Sparkle N Sprinkle & Really Reasonable Ribbon Blog Hop

Hi everyone and welcome to the February Blog Hop. We are so amazingly grateful to be pairing up with Really Reasonable Ribbon today for some great fun. If you have been following along, you should have hopped here from Anne’s blog. If you haven't, please please please pop over to the Really Reasonable Ribbon Blog and hop along. The Design Team members from Sparkle N Sprinkle and Really Reasonable Ribbon have created some amazing projects. You can see that these creations go hand in hand with each others products.

In addition to the Really Reasonable Ribbon blog candy, Sparkle N Sprinkle is giving a stamp set to one lucky hopper!  Leaving a message on every blog increases your chances of winning, because it's a mystery which of the artists' blogs has been chosen to house the prize! On Tuesday February 15, a name will be drawn from the comments on the mystery blog. Winner gets to choose a stamp set of their choice from SparkleNSprinkle.

This month everyone received the wonderful February Ribbon Kit from Really Reasonable Ribbon, filled with the perfect trims and ribbons for those cheery Springtime projects. Lots of great pastels to match up with some amazingly beautiful glitters, flocking, stamps and embossing powders from Sparkle N Sprinkle. If you love using great glitter and embossing powders, check them out. I absolutely LOVE their color choices and the stamps leave the perfect images.

I have 3 new card creations for you today.

 My first card is is made up of stamps from set 417, Cocktails II, perfect for party invitations or scrapbooking that last year’s luau you had or whatever you might come up with. Tropical drinks remind me of great tropical colors and the ribbon in the February Ribbon Kit has a perfect shade to go with all the wonderful tropical colors I used on this card. I used Spellbinders Circle dies to showcase the appetizers and words and I used the Watercolor Pencils to get those soft iridescent colors.


On my next card, I used a stamp from the stamp set 413, Daddy’s Princess.

The Becca with Tulips stamp is so cute and to frame her, I used a new embossing folder that cuts and embosses. I added Buttercup Petal and Green Apple Embossing Powders in the debossed areas of that design. The trim that I used is the beautiful ribbon from the February Ribbon Kit. Copic markers were my choice for coloring the Becca stamp. Copics are so easy to color with and the range of colors to choose from is awesome.


The third card is a really unique card and it’s definitely able to be mailed. It is called a Fan Fold card and is so cute. The stamped images are again from set 413, Daddy’s Princess. The images are stamped and embossed with Black Detail EP and then colored with my favorite, Copic Markers. I used the Scor-Pal to score the cardstock. The card front utilizes a punch that combines flowers and leaves. I used Copic markers to color that and added a little Sparkling Snow Glitter as an accent. The oval shapes were made using Spellbinders Oval sets. And check out that ribbon, it's shear, it's feminine and has flowers on it too. Look for that ribbon in the February Ribbon Kit.  And it goes great with the card and the card colors. I am working on a video to show you how easy this Fan Fold card is to make, so check back for that.


All my cards use Tear-ific Tape for adhering and layering of cardstock. I also used the Versamark Pad in my embossing.


Make sure that you have left a comment here and at every stop along the way, you want to be eligible for the Blog Candy that will be awarded. Thank you so much for stopping by today and it has been a great time partnering up with Really Reasonable Ribbon for this fun Blog Hop. Your next stop is Aphra – just click here


Friday, February 11, 2011

Stamps, a Mask and an Airbrush

I was rummaging around in my studio the other day and came across a Tim Holtz mask that I hadn't used yet. Imagine that!!! So, first I used it sponging ink over the mask. It looked pretty good. Next I got really adventuresome and got my Copic Air Brushing System out and tried that. Whoa.................. the airbrush turned out amazing. The mask I used is called concerto, it's been out a few years, so it's not new on the market. Since I just received a new music set, set 424 from Sparkle N Sprinkle last month, I used some of those stamps and designed this new card.(Click here to view the new stamp set 424.)

I also used a vellum sheet and airbrushed some black onto it to have it kind of match the colors on the background of the card. Next I made an oval rosette.The oval shape was easy to achieve. Click here for my rosette tutorial. So, here is my first card with an airbrushed background. I hope you like it as much as I do.

By the way, Sunday, Sparkle N Sprinkle is teaming up with Really Reasonable Ribbon for a blog hop. There will be blog candy awarded from both companies, so, make sure to participate Sunday on a great hop. Clicking here will take you to the Really Reasonable Blog. You are sure to get great ideas and inspiration from everyone participating. Make sure to leave comments to be eligible for the blog candy.
So, I look forward to seeing you Sunday on a great blog hop.

That's it for now, thanks for stopping, see you soon,


Wednesday, February 9, 2011

Joan's Garden Challenge (JG0203)

Hi Everyone. Hope you are keeping warm and haven't received too much snow. Here in my area, it's just cold and the latest snow storm has gone south of us. I glad we didn't get any snow this time around. This weekend we are supposed to see temps in the mid 40's. Bring it on!!!!!

I thought I would enter a challenge from Joan's Gardens. The challenge (JG0203) requested:

1. Use Coral/pink and Green for your colors
2. A Birthday Sentiment
3. Vintage Paper
4. Handmade or Punch flower

Here is the creation I came up with.


I made my own flower and used what I considered vintage paper under the stamped image. I also thought a butterfly would look nice and that flower needed leaves so I used Spellbinders dies to produce those. The stamp is from Lost Coast Designs.

I love pink and green together, it's just so fresh looking, don't you think. These colors remind me of spring, and beautiful flowers and warm weather and open windows and................... well you know what I mean.


Well, I hope everyone is keeping warm and you know, spring will be here soon.
Thanks for stopping,


Tuesday, February 8, 2011

Happy Birthday Jules Verne

I just happened to go out to Google to look up something and low and behold, the Google logo had changed. So then I saw that they were celebrating the 183rd birthday of Jules Verne. WOW isn't that awesome!! Normally this wouldn't mean too much to me, however, I just finished a card that had a deep sea theme.So I thought the card I made would be so appropriate for his birthday. 

He is best known for novels such as Twenty Thousand Leagues Under the Sea (1870), A Journey to the Center of the Earth (1864), and Around the World in Eighty Days (1873).  We all have probably read one of these books and maybe even saw one of the movies made based on his writings. He wrote about things that hadn't been invented yet, a true visionary. His works are considered science fiction. I find that so amazing because as I read some of his works as a kid, some of the things he wrote about , we had, like submarines. Click here for a site with more info pertaining to Jules Verne, its very interesting.


So here's to you Mr. Verne, HAPPY BIRTHDAY!!!!!


Thanks for stopping by,


Sunday, February 6, 2011

Happy Birthday Card

I was designing  a new card using the Happy Birthday set, set#416 from SparkleNSprinkle. I decided to use items from a few newer dies that I haven't used much. I also made a rosette from scratch. I also included an area using alcohol ink to the front half of the card.

I made the 2 flowers using the 3D Sizzix die, the flourishes are from a Tim Holtz Sizzix die and that  rosette is made from scratch and you can click here for a video that shows how easy it is to make your own rosette (if you don't own a die). I have added the video link to the left sidebar as well for future reference.


 The alcohol ink colors I used are: Butterscotch, Mushroom and Denim. The flourishes are covered in Sparkling Snow Glitter from SparkleNSprinkle. I made the flowers using a die and just added a small pearl in the center of each of the flowers.  Hope this inspires you to use some of the cool tools you have on hand or to try a new technique to make your card.

That's it for now, see you soon and thanks for stopping by,

Thursday, February 3, 2011

Happy New Year - Chinese Style

Today is the Chinese New Year. It's the year of the rabbit.The rabbit it is said is the luckiest of all signs, you are also talented and articulate, affectionate, yet shy, you seek peace throughout your life.

Visit this site for more great information pertaining to the Chinese New Year, etc.

So in honor of this New Year, here is a card I designed.


The stamp in the bottom right is the word eternity.
I hope your new year is a good and prosperous one.

That's it for now, thanks for stopping by, see you soon,


Wednesday, February 2, 2011

Valentine Inspiration

Hi Everyone!!

Hope everyone is staying warm and maybe you're digging out by now if you got hit with a lot of snow. My area lucked out, so to speak, ice but no snow to speak of. Most of the ice has melted off the streets in my area so they are drivable and now it's just COLD.

I have a great new design that I used, for a vintage Valentine Card that will warm your heart. Vintage cards make great Valentine cards and this one definitely has a twist, so to speak. This card is also designed for a challenge at Crazy for Challenges C4C72. There is a quite a lot of glitter on this design but it is so hard to photograph it, you may not see it.


This card is so unique that I felt you might like a few different angles to view this from.

Items used: 
Heart shaped doilies front and inside of card, large square (on inside), round doily
Spellbinders Dies: Nested Hearts front, Oval on the inside.
The red heart on the inside is a Sizzix die (introduced a few years ago).
All cardstock -PopTones (my favorite)
Glitter -Fire Engine Red  SparkleNSprinkle
Embellishments -Rhinestones swirls
Coloring - Airbrushed with Copic Markers
Inks - Distress Ink Antique Linen, Old Paper, Walnut Stain
Stamp - Stampabilities (That Look)

Less than 2 weeks til Valentines Day. Plenty of time to get your Valentines finished. Stay warm and safe.

That's it for tonite, thanks for stopping by, see you soon,