Saturday, August 22, 2020

Joy of the Season

Hello Everyone!!

Hope all is well with you all.

I want to share some exciting news with you. I have been asked to join the design team of Creative Moments. I am really stoked!!!

Creative Moments is a bi monthly challenge blog and the challenges begin on the 7th and 22nd of each month. I will be participating in the challenges on the 22nd of each month. 

The theme is Anything Goes with an optional twist - 
The optional twist for this challenge...
use some patterned paper in your design.

I am using digital images from Decosse Dynamic Doodles

Check her site out. Lisa, the owner has a lot ,and I mean a lot, of cool digital images.

The patterned paper I used, really spoke to me 
and I also decided to use that cool round sentiment.
Those two seemed to be a perfect match.

Here is my finished card

Using my laser printer, I printed the Merry Christmas wording onto Blue CS and printed the round sentiment onto White CS. I foiled both using a blue foil. (It's hard to see the foiling here in the pic - so sorry)

Assembling the card:
I layered silver glitter paper on top of the blue 6X6 card base cutting to 51/2" X 51/2", trimmed the foiled patterned paper to fit in center area of the silver glitter paper and  punched a circle in the center of that patterned paper 

Next, using blue glitter paper, I used a die to cut those snowflake edges and  placed them on the edges of the Merry Christmas patterned paper. I attached the patterned paper to the center of the card.  And the last thing to do was to add the sentiment in the center of the open circle.

This was a fun card to make and I liked it so much I made 3 versions -
for Christmas, of course. LOL

I am submitting my card to the following challenges:

I hope my card give you some inspiration. Christmas will be here before we  know it.

I will be back soon with more projects to inspire you.

Thanks for stopping by

Subscribe by email to receive notices of new posts

Be well and stay safe.
Monday, August 17, 2020

Fall Flowers

Hello my friends!
It's time for a new challenge over on the Artsystamper Challenge blog where the team is showcasing digital images designed by Beverly Cole at Artsystamper Digitals!   The 1st and 3rd Monday of each month brings another Artsystamper Challenge and today's theme is

Fall Flowers

This is an odd shaped card. Let me show you more of this card.
Here is the card open somewhat. 

The flowers, leaves and the sentiment 
I've used on this card are from the 

 Card making is so easy using these beautiful images. 
 Be sure to check 'em out!
Artsystamper (YouTube)


I hope you'll come join in our challenge fun!
You do NOT have to use Beverly's images (of course we would love to see them if you have them) ... but you must follow the theme to qualify for the prize.  PRIZE you say . . .

The winner of our challenges will receive the stamp set of their choice from TheArtsystamperShop.  Beverly Cole's selections offer stamps and sentiments in each set as well as pre-colored images for easy, last minute cards.  Why not take a moment and check out what she has in the store!!

Hop on over to the Artsystamper  Challenge Blog and enter!

You will also see more inspiring designs from the other Artsystamper Addicts designers.   Thanks  SO MUCH for taking the time to stop by!

I am submitting my card in the following challenges:

Well that's it for now.

Thanks for stopping in today.

Sign up to receive an email notice from me on any new posts

Stay safe and be well

Sunday, August 16, 2020

More Flower Coloring

 Welcome back

In my last post I showed how to color using alcohol markers and Blending Solution.

In this post lets look at using alcohol inks to color your images.

Just like my prior post I will be using the new kit Watercolor Florals Card Making Kit
 from over at The Artsystamper Shop.
This kit is brand new and I already have made dozens of cards. 

I think you will really love this kit.

Again, today I am specifically using the Outline Elements sheet from the kit
But this time I printed that sheet onto glossy CS.
 (Prints great with either ink jet or laser printers.)

I used Alcohol Inks, Blending solution, Felt and an applicator


I chose 2 different colors, added some to the felt


I added some Blending solution to the felt over the alcohol ink


I tapped the applicator over the images

Next I colored the other images.

Here are the colored images fussy cut out

Next I mounted some of the images onto a layer piece right down the center. 

The layer piece is 8" X 5 1/4"

After adhering the images I cut the layer piece (Dotted DP) right down the center
right thru the flowers.

This will give you 2 layered card fronts

See how those card fronts fit together
See how the flowers and the leaves were positioned before the cut was made.


Here are the cards separate

Card #1

Card #2


This kit has been fun to play with and to color 
using some different ways but using products
 that we all probably have on hand  and maybe have not used in a while.

I am submitting my card in the following challenges:

Well that's it for now.

Thanks for stopping in today.

Sign up to receive an email notice from me on any new posts

Stay safe and be well


Saturday, August 15, 2020

Forever Friends

 Hello and welcome back!!

Hope you all are doing well.

Since summer is winding down 
I thought I'd share some fun coloring tips,
 for flowers,  I've stumbled upon.

I will be using the new kit Watercolor Florals Card Making Kit from over at The Artsystamper Shop. This kit is brand new and I already have made dozens of cards. 

I think you will really love this kit.

Today I am specifically using the Outline Elements sheet from the kit
I printed that sheet onto vellum. (Works great with either ink jet or laser printers)


I decided to use alcohol markers, Alcohol Blending Solution,
 Alcohol Ink applicator and some felt pads

Next I started out using greens  to color the leaves.


These two sprigs are colored using the same color


Next I loaded some blending solution on the applicator and pounced it over the colored image. 
This lightens the image. It transfers some of the ink in to the felt
If you think the coloring came out  too light, just color the image again and repounce. 

I colored all the foliage and then moved onto the flowers.
 I chose a darker pink to start out with 
Once the blending solution is added to the pad and pounced
 it will tone down that color.

Since there was quite a bit of color on the applicator from applying the alcohol ink,
I pounced the applicator onto the smaller flowers 

Next I used a blue to some of the other blooms on this page. Did the same technique to the bloom portion and then went back and very lightly added green to the leaves.

Ok so here are the images all colored and fussy cut,

Ready to assemble the card.

I finished two cards using the flowers and foliage from the sheet.

Card #1

Card #2

I hope you try using vellum and coloring this way. It's really easy and I love the results

I know you are probably wondering, gee what about glossy paper. Well I will be back tomorrow to share how I worked with the glossy paper and the results on that. 

I am submitting my cards to the following challenges:

A Gem of a Challenge  - #17 - Anything Goes (W1 of 2)
Crafter's Castle  - August Anything Goes 
Crafty Friends Challenge - #142 - Anything Goes (W2 of 2)
Colour Crazy Challenge -  Wk 31 (W2 of 2)  and Wk 32 (W1 of 2) -   ANYTHING COLORING GOES  

Thanks bunches for stopping in today.

Subscribe by email so you don't miss out on any of my posts.

Stay safe and be well

Friday, August 14, 2020

World Wide Open Design Team Challenge #08

It's the start of the next challenge over at 

World Wide Open Design Team Challenge #08

 August 15 through September 12, 2020

Let me share my DT Project 


The image I am using is Owl Fashionista
and she is adorable, isn't she!!!

Come along and join in this great DT Challenge, opened to any DT in the World. 
To be eligible, you just have to be on any DT.

You can enter any image and any project.

Enter our Current Challenge HERE!

Our wonderful Sponsor for World Wide is the lovely  Julia Spiri.

Please support Julia Spiri and visit her Store HERE!

 Come along and join Julia Spiri's Facebook Group
"Stamps by Julia Spiri"
You can join Facebook Group HERE! 

Subscribe to Julia's You Tube  - Here 
Come along and Follow on Instagram. HERE!   Pinterest. HERE!  


SUPPLIES I USED ON MY PROJECT
Stamps:  Digital - Julia Spiri - Owl Fashionista,  Rubber stamp Heartfelt Creations Lush Lilac
Paper/Card Stock
White CS, Green CS, Purple CS, DP
Ink: Distress Ink- Wilted Violet, Memento - Bamboo Leaves
Dies Used: Spellbinders Circles, Heartfelt Creations - Lush Lilc
Accessories
Lace, Spectrum Noir alcohol Markers, flat back pearls, dimensional foam

Challenges Entered:


Thanks for stopping by 
I will be back soon
Stay safe and well.


Tuesday, August 4, 2020

Thinking of You

Hello Everyone
Welcome back to my blog. Since it's the first Tuesday of the month, it's time for my Craft-Dee BowZ Tuesday Inspiration post for August.

I've been playing with some Heartfelt Creations Flowers (stamps and dies and molds) and thought these flowers would look great on a card to share with you all. To add additional interest, I glittered the petals of the flowers.(Hard to see because glitter seems to be camera shy.)

Let me share this cool project with you. 


For My Bow - I used a sheer ribbon (Yep, by now you know it's my #2 bow making material)  and it makes it easy to make a multi loop bow. This bow is a triple loop bow.  


Don't forget, the Craft-Dee BowZ bow making tool is the best tool out there
that will aid you in making your bows.
The tool is small , easy to store, easy to use and so portable.

To order yours, go to the Craft-Dee BowZ blog 
and click on the Buy Now button located on the left sidebar

SUPPLIES I USED ON MY PROJECT
Stamps:  Sentiment - Bright Rosa, Flowers - Heartfelt Creations - Wild Aster
Paper/Card Stock
: White CS, DP's, Green CS, Pink CS
Ink: Memento - Rhubarb Stalk, Northern Pine, VersaFine Clair - Nocturne
Dies Used: Spellbinders Circles, Heartfelt Creations Wild Aster  
Accessories
Sheer Ribbon, Craft-Dee BowZ  tool, dimensional foam. Glitter, Quickie Glue Pen, Yellow Prills, Art Glitter Dries Clear Liquid Glue. Outline Stickers (Butterfly)

I am submitting my card in the following challenges:
Well that's it for now. I hope you enjoyed your stay.
Thank you so much for stopping by today. I will be back soon.

Stay safe and be well

Monday, August 3, 2020

Sentiment-al

Hello my friends!
It's time for a new challenge over on the Artsystamper Challenge blog where the team is showcasing digital images designed by Beverly Cole at Artsystamper Digitals!   The 1st and 3rd Monday of each month brings another Artsystamper Challenge and today's theme is 

Sentiment-al

I took this photo at an odd angle 
so you would be able to see the foiling better.
Foiling is so pretty in person and so difficult to photograph.
I used a pretty pink foil. The foil is all the same color, but the way the light hits it, the images appear to be lighter and darker.

The theme for this challenge is sentiment-al 
and Beverly Cole has introduced a new sheet
 of sentiments available for that next card you need to make. 
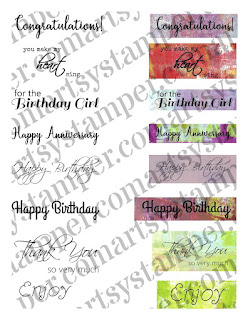
The great thing about this set is that you can print just the one sentiment you need or you can print a sheet that's ready and waiting for you. There are even some pretty backgrounds on the sentiments on the sheet.

 That new set is called Artsy Sentiments Stamp Set 

The flowers I used in the three panels are found in the silhouette set. 
I decided that I could foil those and have them make a statement.  I decided to use a pink foil and I used a pink CS as a frame to highlight that pretty foil color.
 

 Its quick and easy to create a digital card 
using Beverly Cole's beautiful images.  
 Be sure to check 'em out!

Artsystamper (YouTube)

I hope you'll come join in our challenge fun!
You do NOT have to use Beverly's images (of course we would love to see them if you have them) ... but you must follow the theme to qualify for the prize.  PRIZE you say . . .

The winner of our challenges will receive the stamp set of their choice from TheArtsystamperShop.  Beverly Cole's selections offer stamps and sentiments in each set as well as pre-colored images for easy, last minute cards.  Why not take a moment and check out what she has in the store!!

Hop on over to the Artsystamper  Challenge Blog and enter!

You will also see more inspiring designs from the other Artsystamper Addicts DT. Thanks  SO MUCH for taking the time to stop by!

SUPPLIES I USED ON MY PROJECT

Stamps: Digital - The Artsystamper - Artsy Sentiments stamp set  - Field Flower Silhouettes Nature Digital stamp set
Paper/Card StockWhite CS, Pink CS
Accessories: Foam Dots


I am submitting my card in the following challenges:


Thanks for stopping in today

I will be back soon
In the meantime stay safe and be well.